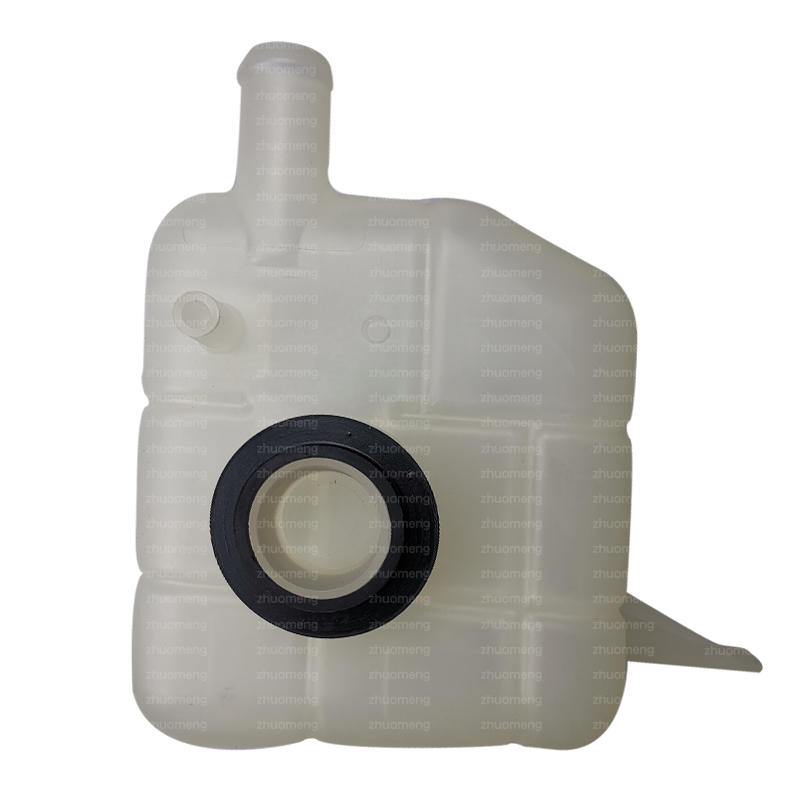
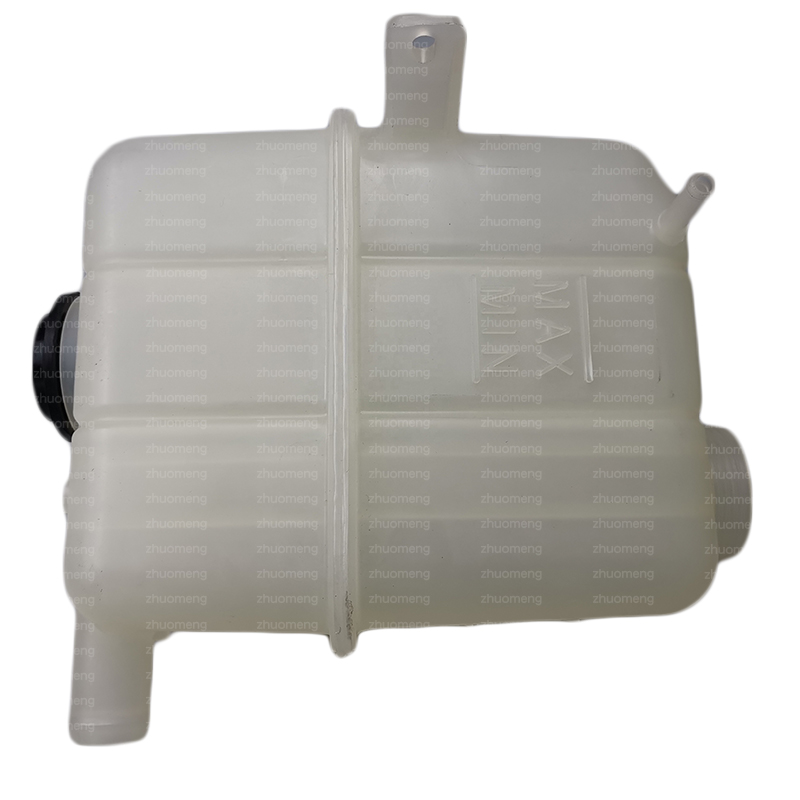
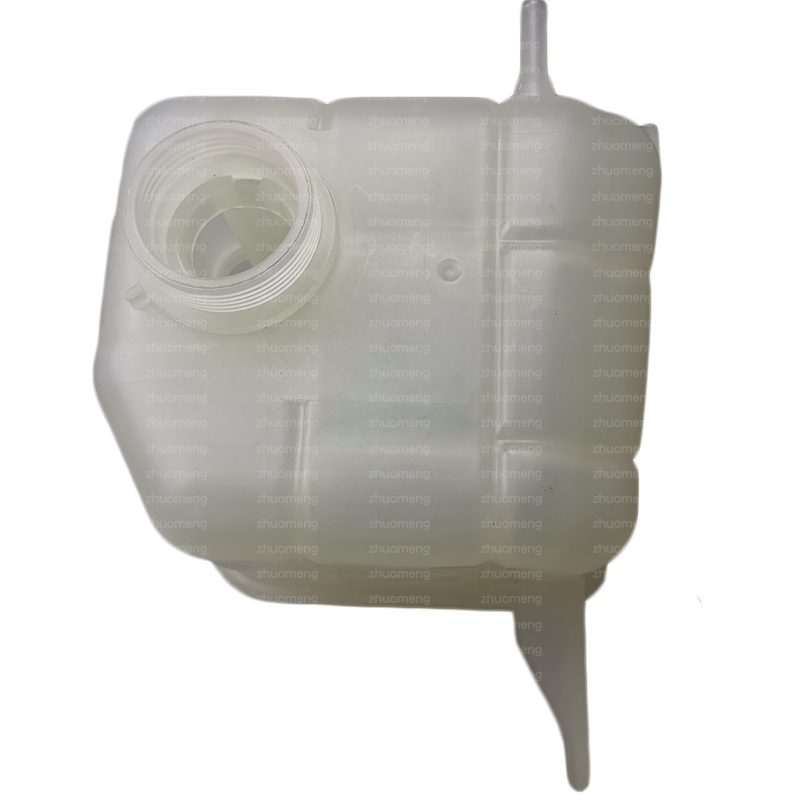
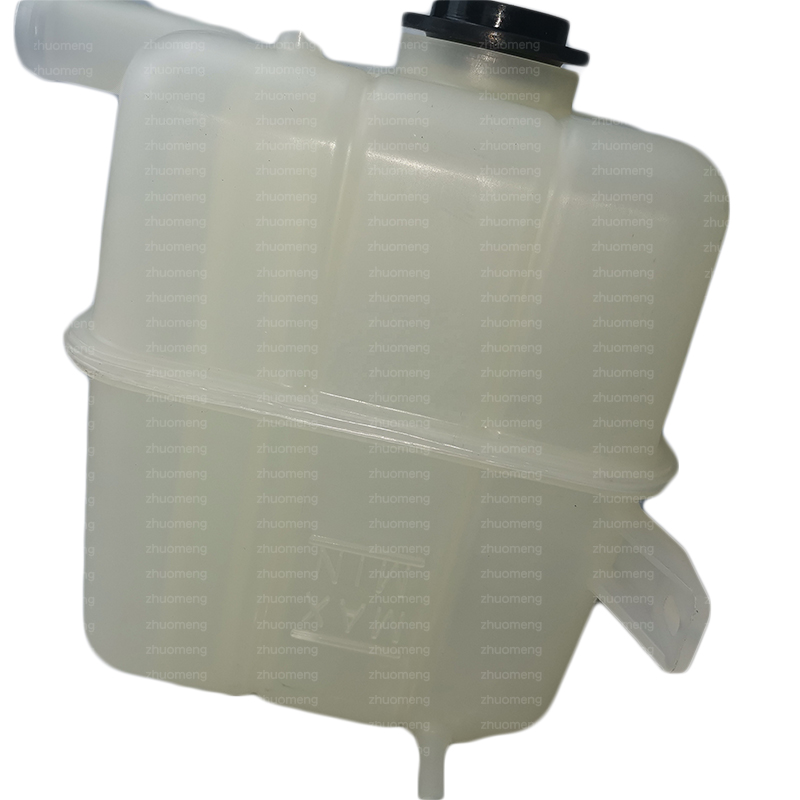
OEM Factory for Maxus T60 Parts - SAIC MAXUS T60 Vice Water Tank C00127188 – Zhuomeng
OEM Factory for Maxus T60 Parts - SAIC MAXUS T60 Vice Water Tank C00127188 – Zhuomeng Detail:
Products Information
| Products Name | Water Tank |
| Products Application | SAIC MAXUS |
| Products OEM NO | C00127188 |
| Org Of Place | MADE IN CHINA |
| Brand | CSSOT /RMOEM/ORG/COPY |
| Lead Time | Stock,if less 20 PCS,normal one month |
| Payment | TT Deposit |
| Company Brand | CSSOT |
| Application System | Chassis system |
Product display
Leakage treatment
When the water leakage is not more than 1mm crack or 2mm hole, add a bottle of strong water tank plugging agent to the water tank to start the car.
5 ~ 10 minutes after opening the cooling water and starting the large circulation, the leakage will stop at the water tank, rubber pipe and everywhere pad in the cooling system. After the leakage is stopped, it does not need to be discharged, which will not affect the heat dissipation and blockage.
If there is no leakage stopping agent to carry, if there is slight water leakage in individual heat dissipation pipes, cut tobacco can be temporarily put into the water tank, and the water circulation pressure can be used to block the cut tobacco at the water leakage of heat dissipation pipes for temporary use.
In case of serious water leakage of the radiator pipe of the water tank, the leaking radiator pipe can be cut off from the water leakage, the cut radiator pipe can be blocked with a cotton ball coated with soap, and then the head of the cut radiator pipe can be flattened with pliers, and then crimped and pressed to stop the water leakage.
If the rubber pipe joint leaks water, wrap the rubber pipe joint clip on the rubber pipe joint twice with a screwdriver in time, and then tighten it with pliers. If the rubber tube is damaged, it can be wrapped tightly with adhesive tape for temporary use.
Folding cleaning steps
Step 1 – start
First, make sure your engine is cold. High heat engine means that the water tank is filled with high-temperature coolant at very high pressure – and you may burn you when you open the water tank cover. Cold water can also damage hot engines.
Step 2 – clean the water tank
Open and firmly secure the hood to avoid accidental slipping. Then, use your nellon brush and soap to wipe the dead insects and debris collected on the water tank grille with water temperature and temperature. Be sure to scrub in the direction of the radiator of the water tank rather than in the opposite direction, because the metal is fragile and easy to bend and deform. Once the grille has been cleaned, direct a gentle flow of water from the hose above the grille to ensure that all debris has been completely removed.
Although you only flush your tank every two years, it’s a good idea to clean the tank grille every 12000 miles or so.
Step 3 – place the drain pan
Proper discharge of waste coolant is very important. Coolant is highly toxic, but it has a sweet taste that attracts children and animals. It shall not be discharged unattended and on the ground. Please make sure you will not use the drain pan for any kitchen purpose – disposable drain pan is the best. The drain pan should also be small enough to be easily placed under your vehicle.
Once you find the appropriate drain pan, slide it under your vehicle and align the center to the tank drain valve (also known as the drain plug)
Step 4 – check the water tank cover
The water tank cover is used as the cover of the water tank to seal and pressurize the coolant in the water tank to keep the engine cool. The coolant pressure varies depending on the engine, and the pressure rating is marked on the top of the cover itself.
A water tank cover includes a spring coil extending between the wide flat metal at the top and the smaller sealing rubber at the bottom. The tension between the spring and the sealing rubber is the key to enable the cover to maintain pressure. Therefore, if both can be easily compressed, it indicates that the water tank cover is worn and should be replaced. Another phenomenon of replacing the water tank cover is that the sealing rubber is rusted or dry. Generally speaking, the tank cover should be replaced at least every two years, so when flushing the tank, you can take it as part of your routine. Remember that different tank caps have different pressure ratings, so be sure to keep the ratings in your vehicle record.

Step 5 – check clip and hose
The next step is to check the rubber tube and clip of the water tank. It has two hoses: one at the top of the water tank to discharge high-temperature coolant from the engine, and one at the bottom to circulate the cooled coolant to the engine. The water tank must be drained to facilitate hose replacement, so please check them before you flush the engine. In this way, if you find that the hoses are broken or leak marks or the clips look rusty, you can replace them before refilling the water tank. Soft, congee like sticky marks indicate that you need a new hose, and if you find any of these marks on only one hose, replace two.
Step 6 – drain the old coolant
The water tank drain valve (or drain plug) shall have a handle to make it easy to open. Just loosen the twist plug (please wear work gloves – the coolant is toxic) and allow the coolant to flow into the drain pan you put under your vehicle in step 4. After all the coolant has been drained, replace the twist plug and fill the old coolant into the sealable container you have prepared next to. Then put the drain pan back under the drain plug.
Step 7 – flush the water tank
You are now ready to perform the actual flushing! Just bring your garden hose, insert the nozzle into the water tank and let it flow to full. Then open the twist plug and let the water drain into the drain pan. Repeat until the water flow becomes clean, and make sure to put all the water used in the flushing process into a sealable container, just as you dispose of the old coolant. At this time, you should replace any worn clips and hoses as necessary.
Step 8 – add coolant
The ideal coolant is a mixture of 50% antifreeze and 50% water. Distilled water should be used because the minerals in tap water will change the properties of the coolant and make it unable to operate properly. You can mix ingredients in a clean container in advance or inject them directly. Most water tanks can hold about two gallons of coolant, so it’s easy to judge how much you need.
Step 9 – bleed the cooling system
Finally, the air remaining in the cooling system needs to be discharged. With the tank cap open (to avoid pressure build-up), start your engine and let it run for about 15 minutes. Then turn on your heater and turn to high temperature. This circulates the coolant and allows any trapped air to dissipate. Once the air is removed, the space it occupies will disappear, leaving a small amount of coolant space, and you can add coolant now. However, be careful, the air released from the water tank will come out and be quite hot.
Then replace the water tank cover and wipe any excess coolant with a rag.
Step 10 – clean and discard
Check the twist plugs for any leaks or spills, discard rags, old clips and hoses, and disposable drain pans. Now you’re almost done. Proper disposal of used coolant is as important as disposal of used engine oil. Again, the taste and color of old coolant are particularly attractive to children, so don’t leave it unattended. Please send these containers to the recycling center for hazardous materials! Handling of hazardous materials.
Customer evaluation
Product detail pictures:


Related Product Guide:
Our personnel are always in the spirit of "continuous improvement and excellence", and together with the top-quality good quality solutions, favorable selling price and superior after-sales providers, we try to acquire each customer's rely on for OEM Factory for Maxus T60 Parts - SAIC MAXUS T60 Vice Water Tank C00127188 – Zhuomeng , The product will supply to all over the world, such as: Germany, Manchester, Roman, Our technical expertise, customer-friendly service, and specialized products make us/company name the first choice of customers and vendors. We are looking for your inquiry. Let's set up the cooperation right now!
Staff is skilled, well-equipped, process is specification, products meet the requirements and delivery is guaranteed, a best partner!


